Window wells are boring. They aren’t flashy, glamorous, or exciting. But they are a homeowner’s first line of defense towards a dry basement or crawl space. When the correct materials are properly installed, they are often the difference between a flooded and a dry basement.
Window Well Function
Window wells have several functions: they allow natural lighting and fresh air into the basement, they allow for a quick and safe exit out of the basement in an emergency, they prevent water from flowing into the basement around the windows, they protect the window frames from damage (rust or rot), and since most basement windows are below the soil level, they allow for a higher grade around the home’s foundation which insures proper drainage away from the home.
Types
There are two main types of window wells, which correspond to the two main types of basement windows: normal or standard (usually smaller) and egress (for a safe escape in the event of an emergency). Local building codes always require an egress window if the basement is used as finished living space. An egress window must be located in every basement bedroom. A family room, rec room, etc. is not required to have an egress window if another basement room (such as a bedroom) has one.
Materials
There are two main categories of window well materials: manufactured or hand-made on-site. Manufacturers are continually coming out with more material options with increased beauty, safety, and function.
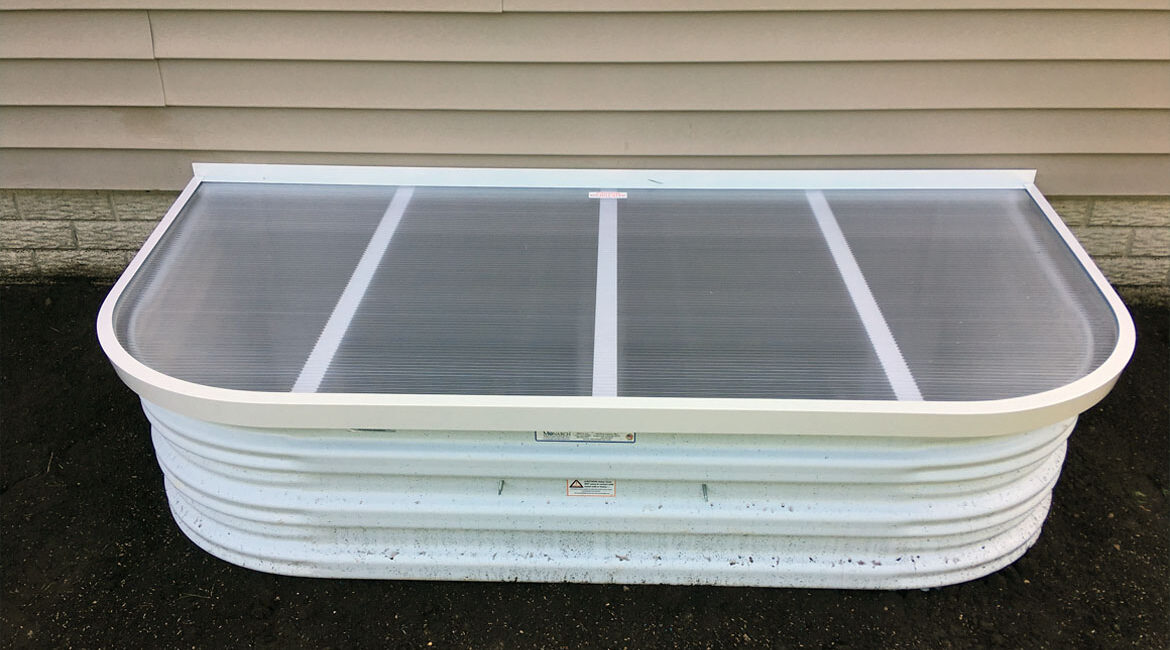
Manufactured
Most manufactured window wells are either metal or polyurethane. We normally recommend manufactured wells as they don’t leak when properly installed. Polyurethane wells have several advantages over metal; they don’t rust, can be ordered with molded “built-in” steps (on larger models), and have a much less industrial look. We usually only install metal when their slightly cheaper price is the owner’s primary consideration.
Hand-made on-site
– Hand-made wells are always segmental, meaning made up of many individual pieces crafted together by the installation crew. The most common materials are landscaping supplies such as retaining wall blocks or limestone, and wood. Due to their segmental nature, any of these may leak at the joints of the individual pieces, especially limestone and retaining wall blocks. Limestone and retaining wall blocks nearly ALWAYS leak during times of high water tables and can cause severe basement flooding. Landscapers install lots of these and we take almost all of them back out after they have caused damage. They may be beautiful, even awe-inspiring, but they’ll almost always leak! If properly installed, wooden wells aren’t anywhere near as likely to leak since we can glue and spike them together for a very tight fit, and wood swells when it becomes soaked. Wood remains a viable option if the visual appeal is critical. We always use top-quality, ground-contact rated 6×6’s and never use the cheaper “landscape timbers” as they will rot in as little as 7 or 8 years. The best quality “treated” 6×6’s are guaranteed to last 50 years.
Installation
window well installation
– Since the prevailing weather patterns in the Midwest arrive from the west, try to avoid an egress well on the west side of your home. Western-facing wells take on significantly more rainwater than wells located on any other side of the home, and the larger opening of an egress well can spell trouble. This is less of an issue with smaller, standard-sized wells. Western-facing wells are especially troublesome attached to tall homes, as much more rainfall hits the side of the home below the gutters and has nowhere to go but straight down the siding and into the well. Egress well covers can usually prevent some of these issues, but they require maintenance, are quite expensive and need to be replaced periodically.
Physical size
– The well needs to be properly sized. When attached too low, (the most common problem with existing wells) water flows over the top and straight down to the window and often into the basement. When ordered too short, inexperienced installers often proceed with installation anyway. They then raise the well up too far in the hole so the top is somewhat correct, which later allows mud to flow under the well and plug the perimeter drainage tile and even occasionally break the window, “flooding” the basement with mud. I have seen just as many windows broken and basements flooded by water and mud flowing under a window well as over the top of one. Water flowing down over the top is bad enough, but almost pure mud coming into the basement from under an incorrectly-sized well is even worse!
Attaching
– A window well must be properly attached. We go on dozens of calls each season in which the wells aren’t attached at all; just the backfilled soil is (partially) holding them in place. This is hard to believe, but I see it almost daily. Anchors and adhesives are both required for a watertight seal between the well and the foundation. Common anchors can be used above-grade, but stainless steel (rustproof) anchors must be used below the soil line to prevent premature failure. We often encounter collapsed window wells due to corroded anchors failing; the worst one I’ve ever personally seen caused $30,000 in damages to a finished basement because someone saved maybe $10 at the time of initial installation by using cheap anchors.
Summary
All basements have windows. Nearly all of these windows need a window well. If done properly, the well can be of great benefit to the homeowner, allowing natural light and ventilation, an emergency escape route, protecting the window frames from decay, and allowing higher soil levels around the foundation for adequate drainage away from the home. If improperly installed, or if inadequate materials are used, they can become a homeowner’s nightmare, leading to tens of thousands of dollars in damages. Yet the greatest benefit may not be financial. Once, after we replaced an inadequate window well for a customer, she said, “Now we aren’t terrified every time it looks like rain!” How do you put a price on that?